Thanksgiving Prep

Standard

I enjoy cooking and trying new recipes.  Recently I discovered a new website (well new to me, at least), Primavera Kitchen, which has lots of healthy recipes.  Since I’m trying to cut down on carbs, I decided to give the Roasted Butternut Squash Mash at try.  The recipe was easy to follow, and while the squash was cooking in the oven, I was able to prep and complete other dishes.

1121181411_HDR~2Here is the squash cleaned, seasoned with salt, pepper, and minced garlic, and ready to pop into the oven for about 40 minutes.

Now on to other dishes – homemade cranberry sauce is a must in my house.  I just follow the basic recipe on the bag – with a few tweaks.  I replace half the sugar with raw honey, and add a dash of ground cloves.   1121181428_HDR~2

Once the berries are fully cooked, just remove from the heat and add the zest and juice of one orange.  I love using my vintage glass juicer; for some reason it just makes me happy.  1121181436_HDR~2

Spoon the finished sauce into a serving dish, let cool, and then cover with plastic wrap and refrigerate.1121181447_HDR~2 Of course, if you’re like me you probably can’t wait to enjoy this yummy side dish, and sneak a little advance taste. Definitely one of the perks of being the cook!

1121181451_HDR~2
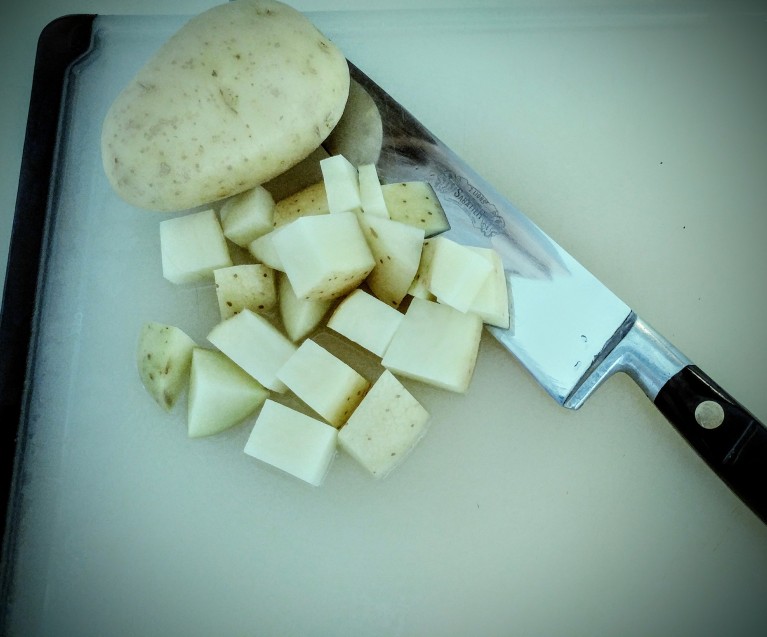
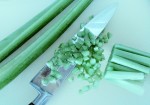
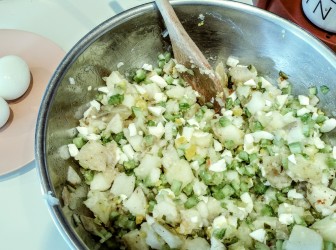
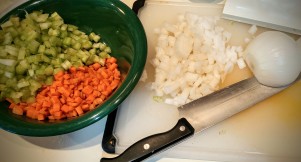
While the cranberries were cooking, I used the time to chop the veggies for the dressing.  Originally, I was going to to skip the dressing, but decided to won’t be Thanksgiving without this traditional dish.


1121181535a_HDR~2
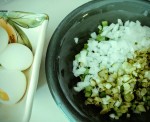
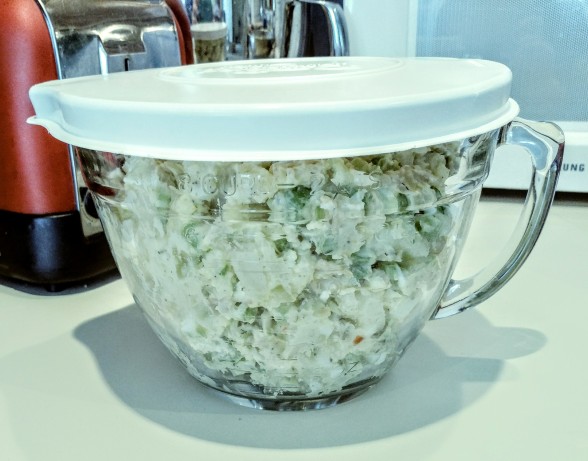
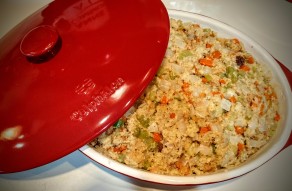
My husband loves celery, so I always add extra along with the onion and some carrots for extra crunch and color.  Plus they’re good for you!  I like moist dressing, so I use about twice the amount of liquid (using the recipe on the package as a guideline) and one beaten egg to hold it all together.  Once it’s all mixed together, just pop it into a covered casserole, refrigerate and you have one more dish ready for your Thanksgiving feast!

1121181452a_HDR~3
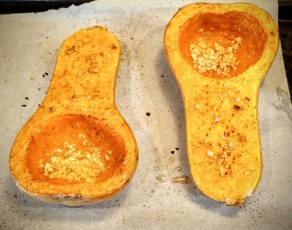
While I was making the cranberry sauce and the dressing, the squash continued to cook.  Once it was fork tender, I simply removed it from the oven and let it cool while finishing the dressing.  It came out slightly browned and the roasted garlic smelled heavenly.

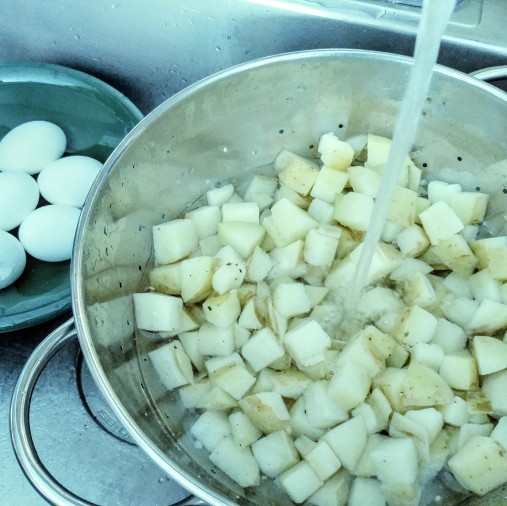
Once the cooked squash is cool enough to handle, scooped out from the shell into a bowl or pot for mashing.

1121181545a_HDR~3I mostly followed the recipe, but omitted the ghee as my husband doesn’t care for butter on his vegetables and after tasting, I didn’t think that this yummy dish really needed the butter.  You can use a regular or hand-held mixer to mash the squash.  Or, go old school and use a potato masher.  The one I have is over 60 years old and used to belong to my mother.  It has seen a lot of action through the years and still works great!  🙂


1121181553_HDR~4
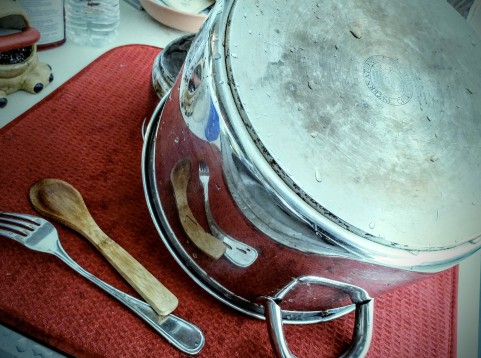
My mashed squash it in a serving dish, and tomorrow all I need to do is heat it up a bit in the microwave.

I’ve certainly gotten a good head start on the cooking for tomorrow.  All that’s left to do is to clean and prep the turkey for cooking and get my vegetables ready.  I’m going to put fresh herbs (rosemary, sage, & thyme) in the bird’s cavity and  I plan on using Primavera Kitchen’s recipe for roasted Brussel Sprouts, adding carrots and parsnips, too.


Hope you have a wonderful and delicious Thanksgiving!  I know that I am thankful to Olivia of Primavera Kitchen for sharing her recipes with us.

Enjoy, Mary


A Home Cooked 4th!

Standard

I wasn’t planning on making potato salad, but when buying grass fed beef (trust me, it tastes sooo much better) for burgers, I saw a bag of potatoes and figured why not!  It’s not hard to make and if you know your way around the kitchen, you really don’t need to refer to a written recipe.

Knowing I wanted to get an early start, so everything could be nice and chilled for later today, I started at about 7:45 and was out of the kitchen with potatoes and eggs cooked, and dishes done by 8:30.  That’s with all of my usual distractions including making and drinking coffee, and taking photographs, too.  Here’s my morning prep:

0704180803a_Film2

Scrub and chop your potatoes. I leave the skins on because there are more nutrients there.  (Totally staged shot, because I’m left handed. HaHa)


0704180804_Film2

Put eggs in a pan of cold water with about 1t of salt & 1T of vinegar (makes for easier peeling). Bring to boil and then remove from heat. Let sit for 20 minutes off heat.

0704180804a_Film2

Add chopped potatoes to cold salted water and bring to boil.

0704180820d_Film2

Bring potatoes to a rolling boil; reduce heat and cook for about 5 more minutes. Taste for desired doneness.

0704180820b_Film2

Drain eggs; run under cold water and place in ice bath to halt cooking.

0704180828_Film2

Drain potatoes into a colander and rinse with cold water to stop further cooking.

0704180834b_Film2

Wash up your dishes. I like to clean as I cook so there is not a big mess in the kitchen.

0704180823_Film2

Have a refreshing beverage, you earned it!

0704180824a_Film2

I’m having cold brew iced tea.


Next steps for later in the day.

Potatoes and eggs are cooked and cooled! Now it’s time to gather our ingredients and make some potato salad – – –

Time to practice our knife skills – –

Peel and chop the eggs:


The ingredients are chopped,  so now we need some seasonings – –

0704181159_Film2

French seasoning mix, Italian dressing, mayonnaise, salt & pepper.

0704181203_Film2

Oops, almost forgot the dill.


Let’s mix it all together – –

0704181200_Film2

Add potatoes to large mixing bowl and season with the Italian dressing – about 2T

0704181201_Film2

Add and stir in the chopped ingredients. The eggs to the left are for Deviled Eggs.

0704181201a_Film2

About 1/3 cup of mayonnaise

0704181203a_Film2

Time for the herbs! Season with salt & pepper to taste.

0704181206_Film2

Mix well, place in lidded container, and refrigerate.  Correct seasoning prior to serving.

0704181210_Film2

Clean up the dishes and you’re done!


It took me about 35 minutes to chop, mix, season, and clean up. If I hadn’t been taking photographs during the process, it would have take less time. Added bonuses to your time spent in the kitchen – – tastes better than store bought, you can control the ingredients, the satisfaction and pleasure of making good food!


0704181140_Film2

Don’t forget to give your kitchen supervisor a treat.


Crochet Flag: Putting It All Together

Standard

Today we will turn this pile of crochet parts – –

all_the_stripes[1]

Into this finished hanging – –

flag_on_door[2]

Previously, in creating our Crochet Flag Hanging, we did this Flying the Flag and then we did this A Stick and Some Stripes. Now we get to combine all of of our bits and pieces into this final, finished project.  Your project won’t look exactly like mine, and that is a good thing because is is yours!!

Step One (Optional):  Have your project pieces approved by your fur baby.

shadow_on_flag[1]

Shadow testing my work and giving her approval.

Step Two:  Lay out the pieces for assembly (Note:  the arrangement is actually face down).  The short stripes start and end with red along the edge of the blue Union field.

making_stripes[1]

The ends are not yet woven in as they are needed in the next step.

Step Three:  Working from the backside, sew your stripes onto the blue Union.  I only wove in one end, and kept the other end for this purpose.

flag_see[1]

flag10[1]

I worked from the edges of the Union towards the center to ensure semi-even spacing.  No measuring tools were used in this easy project.

Step Four:  To attach the long stripes to the flag, you will need a support piece (sorry, forgot to mention this earlier).  You may use a length of ribbon, or as I did, crochet a strip of foundation half-double crochet (fhdc).

flag4[1]

I attached with a slip stitches (ss), putting a chain between the ss for flexibility.

Step Five: After attaching the Union, continue with the stripes, beginning with white and alternating with red.

flag3[1]

Almost finished!

Step Six:  This is optional, but I decided to sew the first long white stripe to the Union for additional stability.

flag[1]

First long white stripe attached part of the way down the Union

flag1[1]

Reversed, but looking good!


Step Seven:  Attach your completed flag to its hanger.

mod-podge.jpg What you do will vary.  You can sew your flag onto a stick or rod, use nails or clips, or as I did, some strong glue.  I chose to use Outdoor Mod Podge because there was some on-hand (no need to go and purchase any supplies – YES!!).  Make sure you are applying any adhesive to the FRONT side of your flag along the top vertical ribbon and don’t be stingy with the glue.  Your hanging stick will be on top of the flag.  Please make sure that the blue Union is to the LEFT.

Glued to Stick

twine


Step Eight:  If using a liquid adhesive, be sure to check dry times.  I allowed about 24 hours to be on the save side.  Turn flag to right side, Union will be on the left and attach string or other hanging device as needed.  I used twine, from a dollar store, that was left over from a prior project.


Step Nine:   Your flag is now ready for display.

Adding String

Ready for display!


Step Ten:  Take some pics and share your talents and patriotism with others!  Have a safe and happy 4th of July!

flag on door vivid

World Cancer Day

Standard

Today, February 4th is World Cancer Day.  I imagine that most people have been touched by cancer in one way or another. They may have had cancer themselves, or been through this life-changing event with a loved one. Perhaps you know a neighbor, church member, or student who has had cancer.  Thankfully, with today’s advances in medicine the prognosis for cancer patients is improving. However, it all depends on catching the cancer early.

In January 2009, my father was diagnosed with late-stage throat cancer. he had ignored the signs and would not see a doctor until the cancer was quite advanced.  By mid-February we said our final goodbyes at his memorial service.  Later that same year, I too was diagnosed with cancer, fortunately my outcome was different.  I knew something was wrong, but not what and went through test after test, all with negative results until an ultra-sound finally uncovered what was wrong; I had bilateral ovarian cancer.

Bald

With my mom, in 2010 after chemo-therapy. We are both wearing teal for ovarian cancer.

Today, I consider myself one of the lucky ones in that my cancer was discovered at stage 2, which is still an early stage.  Only 20% of all women with ovarian cancer are diagnosed at an early state.  Yet, an early diagnosis means a world of difference and an amazing 94% 5-year survival rate.  Unfortunately, there are no tests for early detection. Instead, it is important to know the symptoms and your body.

Signs & Symptoms:

  • Vaginal bleeding or discharge from your vagina that is not normal for you.
  • Pain in the pelvic or abdominal area (the area below your stomach and between your hip bones).
  • Back pain.
  • Bloating.
  • Feeling full quickly while eating.
  • A change in your bathroom habits, such as having to pass urine very badly or very often, constipation, or diarrhea.

If you experience one or a combination of these symptoms, and they persist for several weeks then you should see your doctor for an evaluation.  Being aware may save your life or the life of another woman.

For more information on ovarian cancer, please visit the National Ovarian Cancer Coalition (NOCC) or the Ovarian Cancer National Alliance (OCNA).  You may also click on the link below to open a PDF file with information provided by NOCC.

http—ovarian.org-docs-NOCC14.08_PDF

Life Goes On – A Reflection

Standard

This has been a difficult year for my family. A beloved uncle died followed by the death of my husband’s mother. She would have been 95 in June and loved to sing, laugh and tell stories and jokes.

My mother-in-law, or Ma as  she was called by her children and me, was a true Southern lady. Originally from New Orleans, she moved with her husband and five children to Maryland in the 1960’s. Ma was a devout Catholic and always dressed for church; no pants for this Southern lady.  She was the glue that held her family together and there was nothing that she liked better than to cook a huge meal for her loved ones. I was introduced to Creole cooking at her table where she often served shrimp stew, red beans and rice, and stuffed baked mirlitons (milla-ton). For your birthday, she would always cook your favorite dishes and have a homemade cake for dessert.  Her family and her faith were the most important things in her life.  She is well-loved by family and friend and deeply missed.

ma1

I haven’t written a post for some time, as we have been dealing with all of the legal issues in settling an estate that arise when a family member dies. It can be tiring and draining at times, but writing about this amazing woman has brought a smile to my face.

Ma, I know you are in heaven with your Kermit. I’m sitting here with my Kermit and we both miss you and your “hello-ooos.”

Season’s Greetings

Standard

Hope everyone had a joyful and blessed holiday. We were fortunate enough to be able to spend the day with family. Our day was filled with the laughter of young and old, good conversation, and delicious food. Of course, I ate too much. Started out with good intentions and small servings, but went back for more of my favorites.

IMG_3264

Shadow “hanging” out in our Christmas tree. One of her favorite places.

Our Christmas dinner was a pot luck with the hosts providing a glorious prime rib, mashed potatoes, gravy and au jus. Contributed sides included a twist on the classic green bean casserole – prepared in a crocked pot, maple glazed carrots with dill, and baked beans with bacon.

A holiday feast is not complete without dessert – – we had two of my favorites – – apple crumb pie and sweet potato pie. How could I possibly choose just one!  Had to have some of each.

After dinner, we unwrapped gifts while sitting around the fire. Because our family has grown so large, adults pick names at Thanksgiving for a Secret Santa exchange.  I brought “goodie bags” for everyone filled with Salty Chocolate Chip cookies (with coconut and caramel bits added to make them EXTRA yummy), Fig Walnut balls, and Coconut Chocolate Haystacks.

IMG_3307

Making Coconut Chocolate Haystacks at Christmas time is becoming a holiday tradition. Best of all they are super easy to make!

Ingredients and Supplies:

12 ounce bag of dark chocolate chips (I like to use Ghiradelli)

14 ounce bag of sweetened coconut

Glass batter bowl – 2 quart size

Small Scoop – Tablespoon Size (I use Pampered Chef Small Scoop)

Waxed Paper

Directions:

Pour chips into a glass bowl and microwave on high for 1 minute. Remove from microwave and stir chips. Return and microwave for 30 seconds. Take out and stir well. Once more for 30 seconds, stir well until all chips are melted . If necessary return to microwave for 15 more seconds.

Slowly add coconut, breaking up clumps and stirring well after each addition. Keeping adding coconut and stirring until you have used all of the coconut. You will have a stiff mixture.

Use scoop and press against side of bowl to compress. Dispense onto wax paper and let the haystacks set until firm. Stored in an airtight container. Makes lots! About 4 to 5 dozen.

IMG_3306

Share, eat and enjoy!

Need a glass bowl or a small scoop? Check out the following links – –

The Pampered Chef Small Scoop #2530

Anchor Hocking 2 Quart Ovenproof Glass Batter Bowl